
NC ALLIES Client Tracking User Guide
NC ALLIES: A Local Link to Improve Effective Services
Client Tracking User Guide
Juvenile Justice and Delinquency Prevention
Last Revised - September 28, 2012
Table of Contents
A special thank you to the Governor’s Crime Commission for financial support with this project.
Document Overview
The North Carolina Division of Juvenile Justice (DJJ) partners with the Juvenile Crime Prevention Councils (JCPC) in each county to galvanize community leaders, locally and statewide, to reduce and prevent juvenile crime. DJJ allocates approximately 22 million dollars to these councils annually. Funding is used to support local programs and services. This document is designed to help the North Carolina County Community Program users create a North Carolina Identity Management (NCID) account, register as a NC ALLIES user and log into NC ALLIES.
NCID Information
For problems with NCID Accounts email [email protected] or call 919-754-6000 or 1-800-722-3946.
NC ALLIES Contact Information
For problems or questions regarding NC ALLIES, contact your local JCPC Consultants and Processing Assistants OR email [email protected]
User Guides can be found at http://www.ncdjjdp.org/jcpc/forms_agreements.html
NC ALLIES Application Information
| Action Button | Description |
|---|---|

| Indicates required fields. Users are not able to save and continue to a new screen until all required fields have been completed. |

| Indicates informational buttons. Users can click on the information buttons to learn more information about what should be entered in a particular field. |

| Users can click on the Save button to save any new information or changes made and proceed to another screen. |

| Users can click the cancel button to either discard all changes made on the edit screen or return to the previous screen. |

| Users can click the edit button to make changes to screens where data has previously been entered. Remember to click the Save button after making changes! |

| Users can click the Delete button to remove information. There is security in place to keep users from deleting records that have additional information linked to them. |
NC ALLIES Client Tracking
At this point, users should have registered for both an NCID account as well as an NC ALLIES account.
- Open an Internet browser (Internet Explorer, Firefox, Safari…).
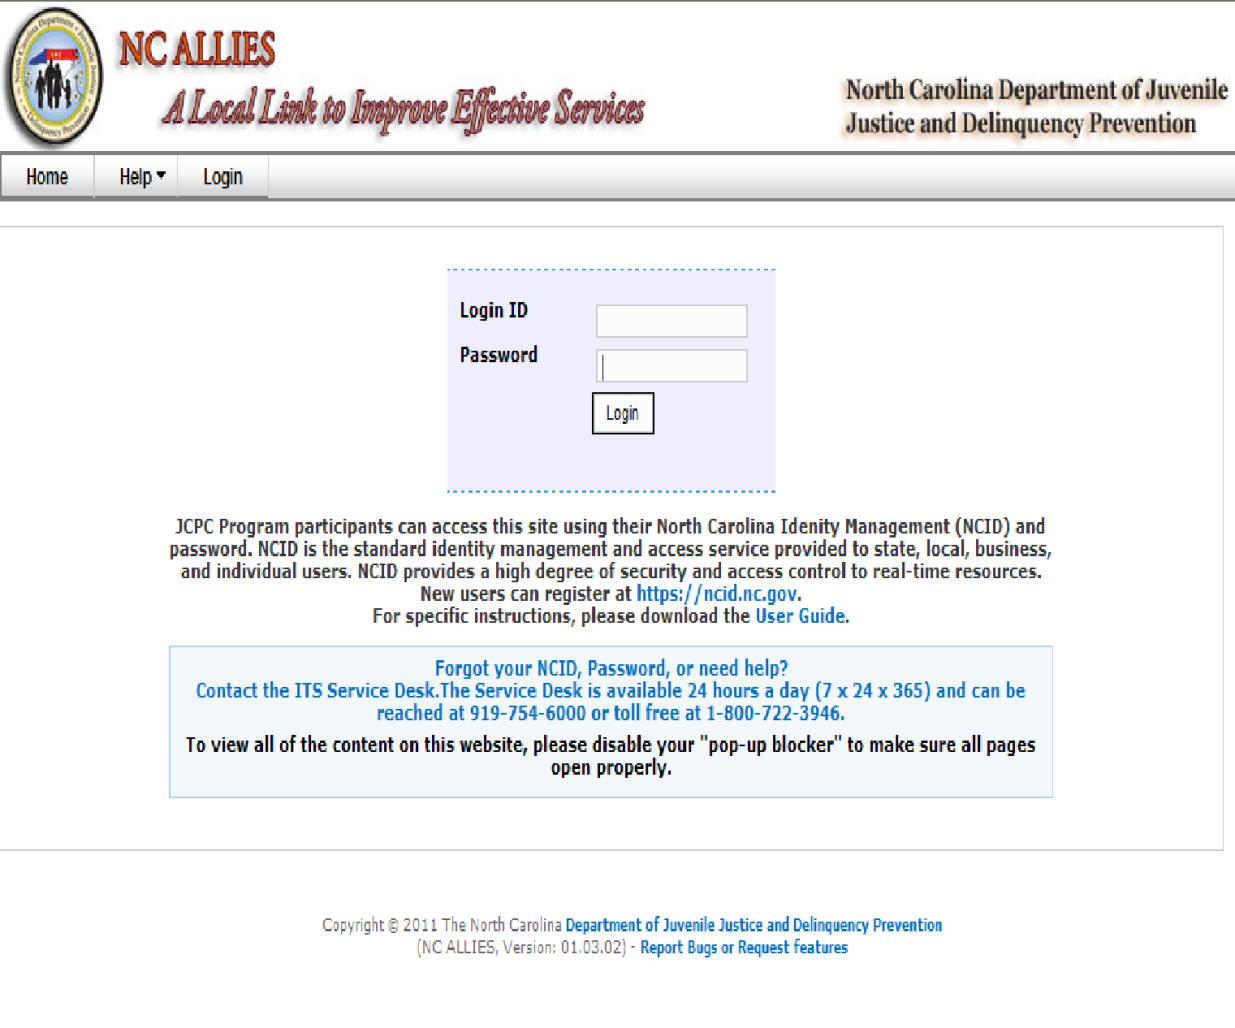
- Type https://cp.ncdjjdp.org/CP in the address bar and click the Enter button on your keyboard to access this website. If you have already created a shortcut, bookmark, or favorite you may use this to access the login screen. If you have not created a shortcut, bookmark, or favorite, now is a good time to create one.
- Enter the Login ID (User Name) and Password used for NCID and click the Login button
Login and Search for Program
- At this point there are three types of user:
- Have registered previously for your NC ALLIES account and are logging in for the first time
- Login and continue to Step 2
- Those who have just registered for NC ALLIES account and are already at the Search Program Screen
- Skip to Step 5 of this section
- Already have access to a Program record within NC ALLIES and are ready to begin Client Tracking
- Login and skip to Step 8 of this section
- Have registered previously for your NC ALLIES account and are logging in for the first time
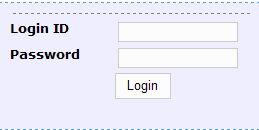
Enter your NCID Login ID and Password. Click on the Login button.
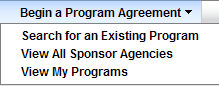
Click the Begin a Program Agreement link in the menu bar. You are not actually going to begin a program agreement.

Scroll down and click the Search for an Existing Program link.
Enter the name or part of the name of the program in the Program Name field.
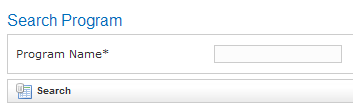
- Click the Search button.
Depending on the word(s) you used to search, you may/may not see the names of programs returned in your search results. If too many results or no results are returned in your search, then you may choose to click the Refine Search Criteria button, modify your search criteria, and click the Search button again.

When you find the correct program, type the DJJ Funding ID in the corresponding text field. If you do not know the DJJ Funding ID, contact the person(s) who created your program agreement.

- Click the Select button.
A screen will appear confirming association with the existing program.
- Users beginning with this step will already be at the Program List after login. There will be a new link on the right side of the screen for Client Tracking. This Client Tracking link will only appear programs approved for funding.

- To access client and program specific information, click the Client Tracking link. Users may/may not have the View option as shown in the picture above. The View link shows up only for users with the ability to view the Program Agreement information. If your program does not have the Client Tracking link, please contact your local DJJDP JCPC office to find out the status of your approval.
Accessing Component Information
After clicking the Client Tracking link, the screen will display all Components associated with the Program.

- In addition to the name of the component, this screen will also display the Component Type, Open Referral client count, Current Population client count, and the On Waiting List client count.
To access the Component information, click the name of the Component link.
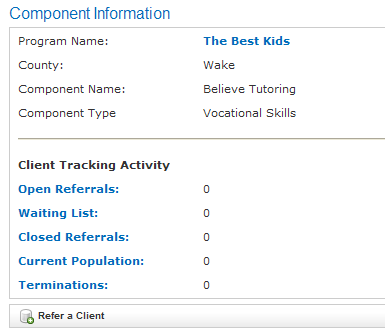
The Component information screen will display.
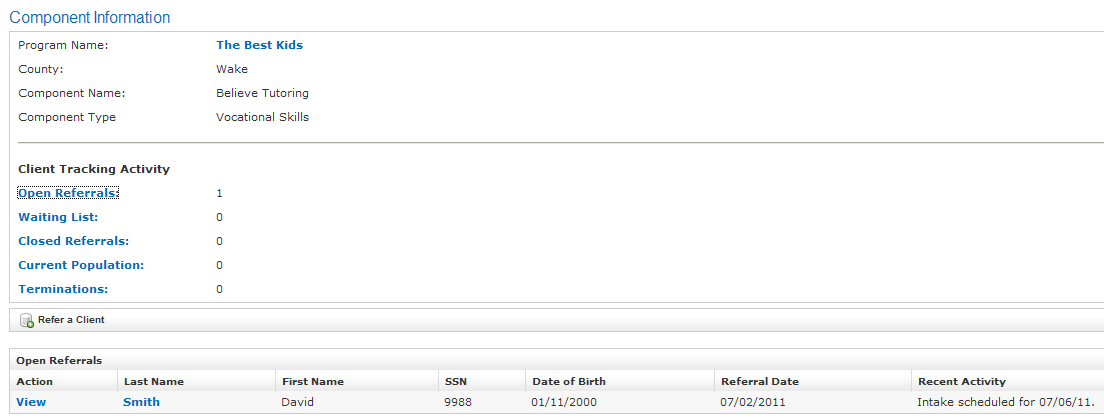
NOTE: The words in blue/bold font in the Client Tracking Activity section are links. When clicked, they open the corresponding list in the space at the bottom of the screen as shown in the image below.
Searching for a Client
To create a referral, click the Refer a Client button.
- Search using combinations of the criteria below. Either the Last Name, SSN, or NCWise Student ID are required when searching. When searching it is best practice to use a minimal amount of information to reduce duplication of work. Within NC ALLIES clients may be attached to (participating in) multiple programs. When you search for a client, it is possible that they will already be entered and will not need to be entered again.
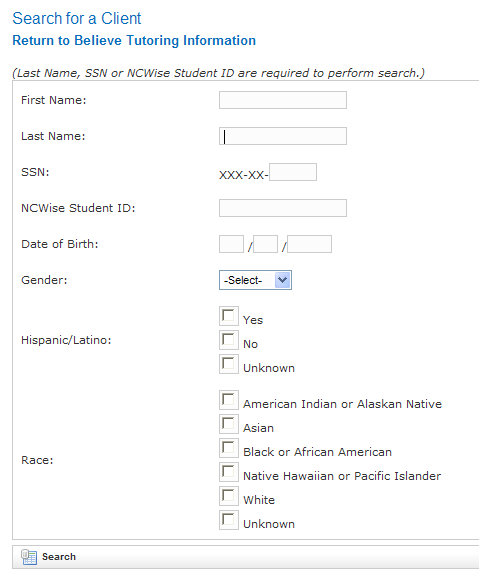
- If no clients match the criteria you searched on, a message will display indicating no search results.
Search again

Matches returned verify correct juvenile. To verify further information, click the first name of the client to access more detailed demographic information.

- If this is the correct juvenile, click the Create Referral link and skip to the Creating a Referral section of this user guide. If this is not correct juvenile, proceed to the Creating a Client section.
Creating a Client
To create a client, click the Add New Client button.
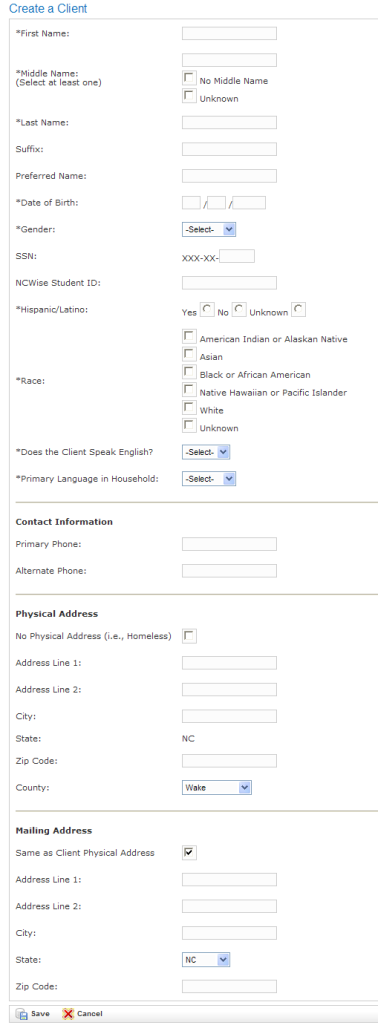
- Complete all known information including all of the required fields.
- Click the Save button.
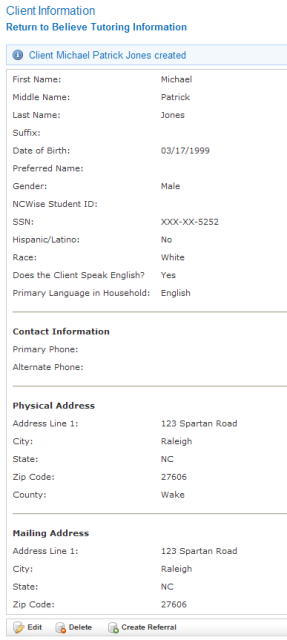
- After clicking the Save button, the Client Information screen displays. Users have the option to Edit the information just entered, Delete the Client, or Create a Referral. Clients may not be deleted once they have been attached to a program but their demographic information may be edited or updated at any time. To Create a Referral for this client, click the Create Referral button at the bottom of the screen
Create a Referral
- Users can access the Create Referral screen one of two ways
Create Referral link on the Search for Client screen

- Create Referral button on the Client Tracking Information screen
The following screen will appear
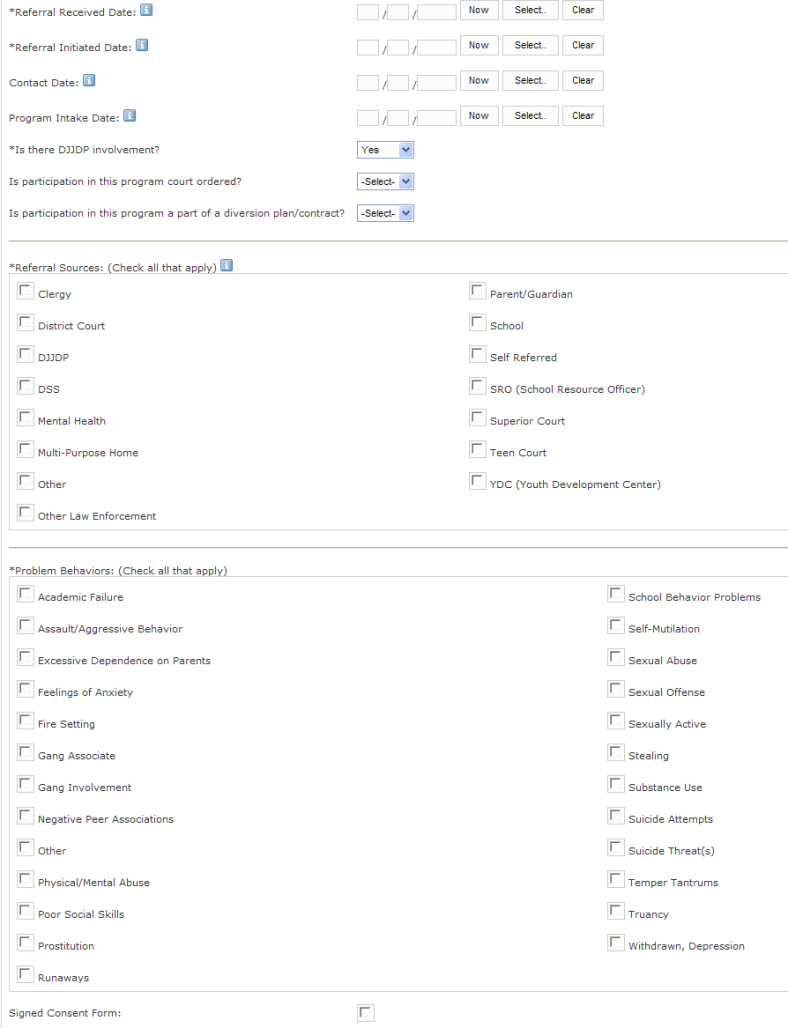
- Complete all known information including all of the required fields.
Click the Save button.
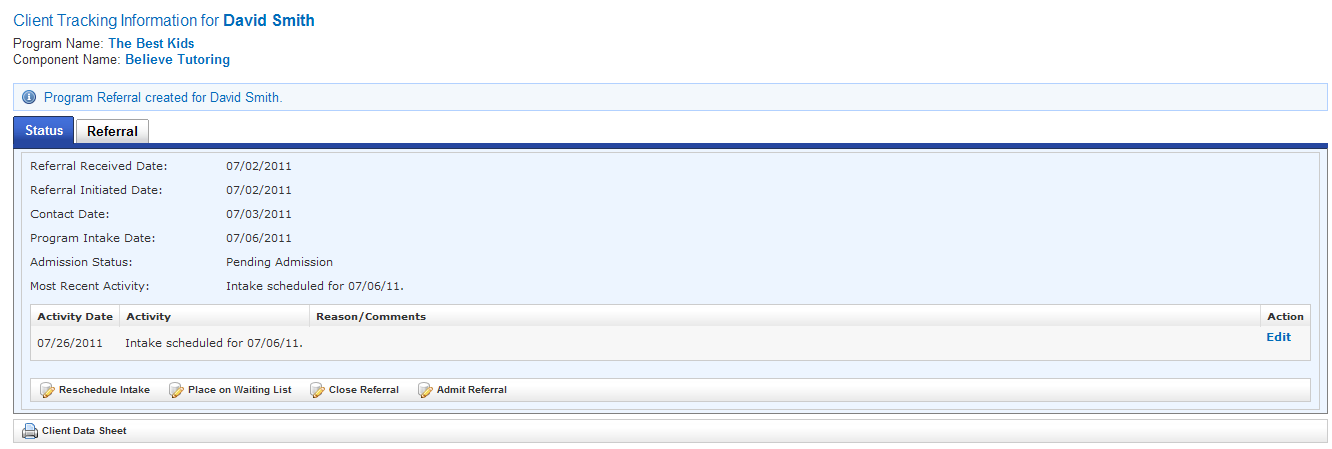
- Several screens may be accessed from the Client Tracking Information screen
- Edit the Intake Information by clicking the Edit link
- Reschedule Intake – see Page 14
- Place on Waiting List – see Page 15
- Close Referral – see Page 16
- Admit Referral– see Page 7
- Print Client Data Sheet – see Page 21
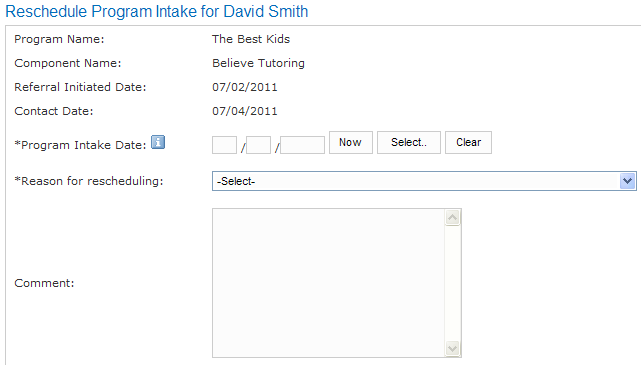
Reschedule Intake
From the Client Tracking Information Status tab, click the Reschedule Intake button.

Complete the required rescheduling information and click the Save button.
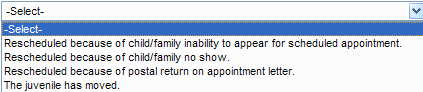
Reasons for Rescheduling
Place on Waiting List
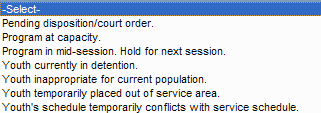
From the Client Tracking Information Status tab, click the Place on Waiting List button.

Complete the required rescheduling information and click the Save button.
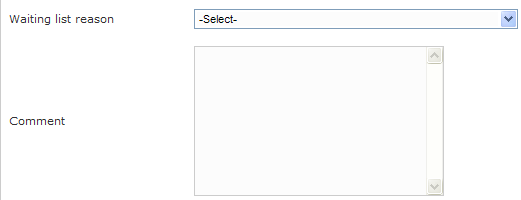
Waiting List Reasons
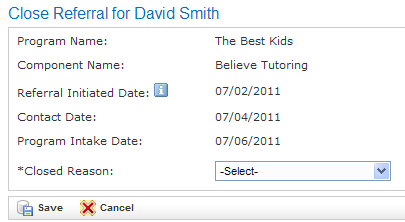
Close Referral
From the Client Tracking Information Status tab, click the Close Referral button.

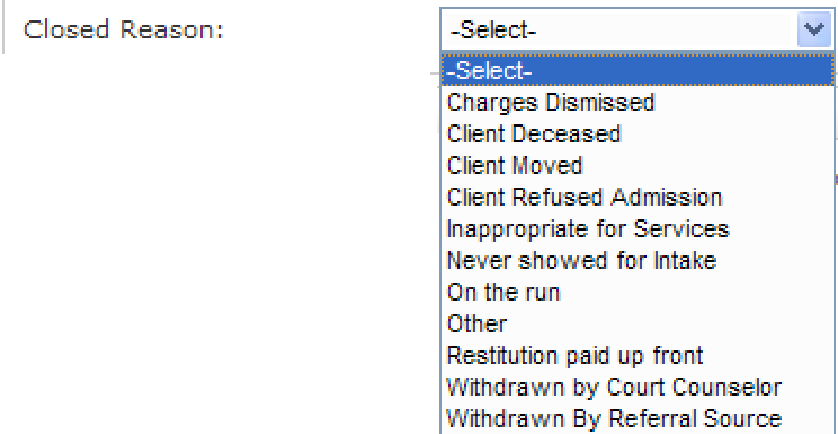
Complete the required rescheduling information and click the Save button.
Closed Reasons
Admit Referral
From the Client Tracking Information Status tab, click the Admit Referral button.

Complete the required rescheduling information and click the Save button.
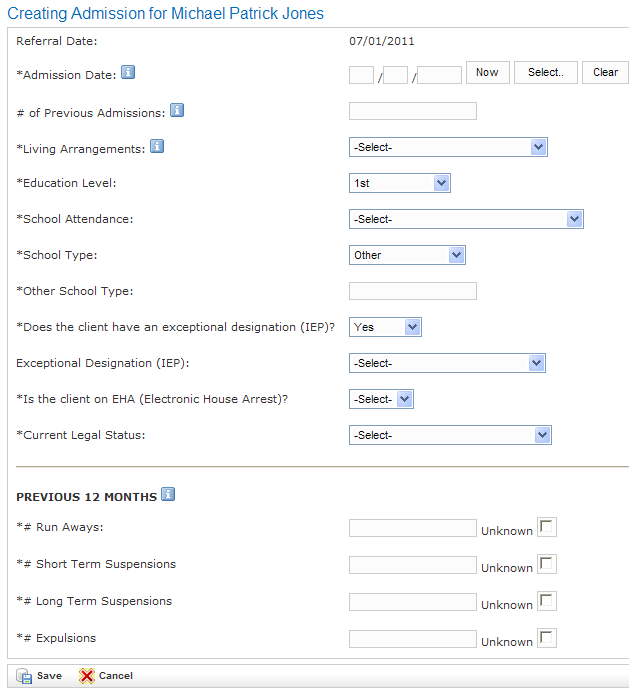
| Category 1 | Category 2 |
|---|---|
Living Arrangements 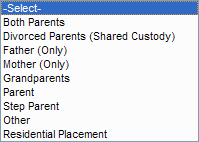
| Does the client have an exceptional designation (IEP) 
|
Education Level 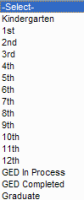
| Exceptional Designation (IEP): 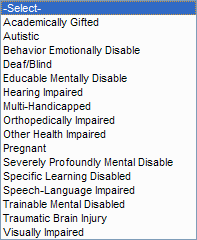
|
School Attendance 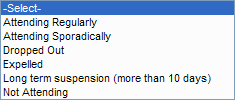
| Is the client on EHA (Electronic House Arrest)? 
|
School Type 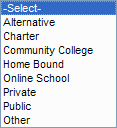
| Current Legal Status: 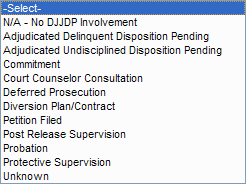
|
Termination
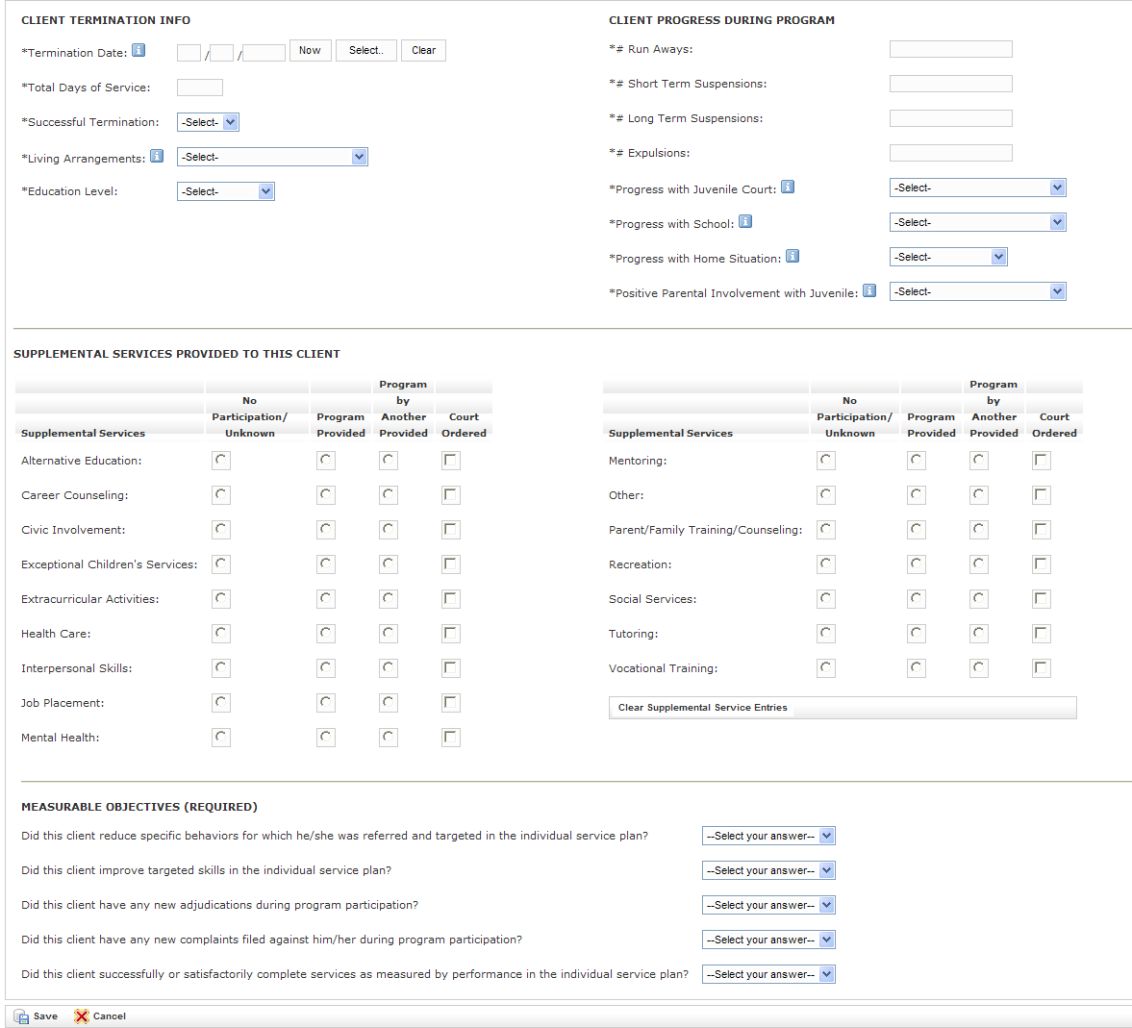
From the Client Tracking Information Status tab, click the Admit Referral button.

- Complete the required rescheduling information and click the Save button.
NOTE: The Supplemental Services section will not appear on the Termination screen for the following component types:
- Temporary Shelter Care
- Runaway Shelter Care
- Temporary Foster Care
- Psychological Assessments
NOTE: Termination Questions will not appear on the Termination screen for the following component types:
- Runaway Shelter Care
- Psychological Assessment
- Temporary Foster Care
- Temporary Shelter Care
NOTE: Measurable Objectives will be based on component type and Optional Measurable Objectives entered on the Program Agreement.
| Category 1 | Category 2 |
|---|---|
Successful Termination Reasons 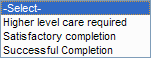
| Progress with Juvenile Court 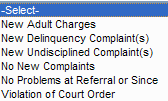
|
Unsuccessful Termination Reason 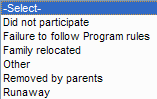
| Progress with School 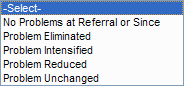
|
Living Arrangements at Termination 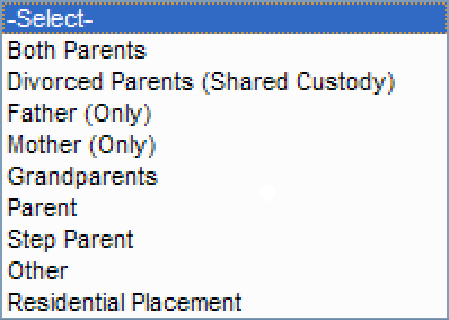
| Progress with Home Situation 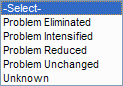
|
| Education Level -Select- Kindergarten 1st 2nd 3rd 4th 5th 6th 7th 8th 9th 10th 11th 12th GED In Process GED Completed Graduate | Positive Parental Involvement with Juvenile 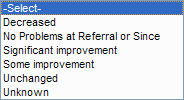
|
Client Data Sheet
From the Client Tracking Information Status tab, click the Client Data Sheet button.

- Another window will open up with the NC DJJ JCPC Personal Data Sheet.
Reports
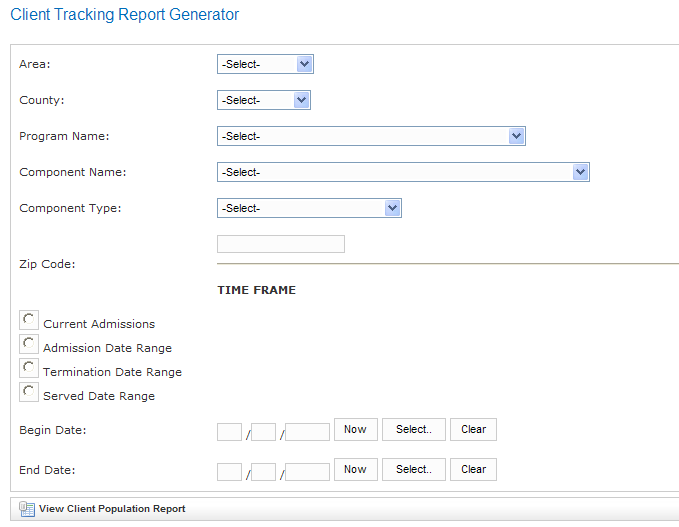
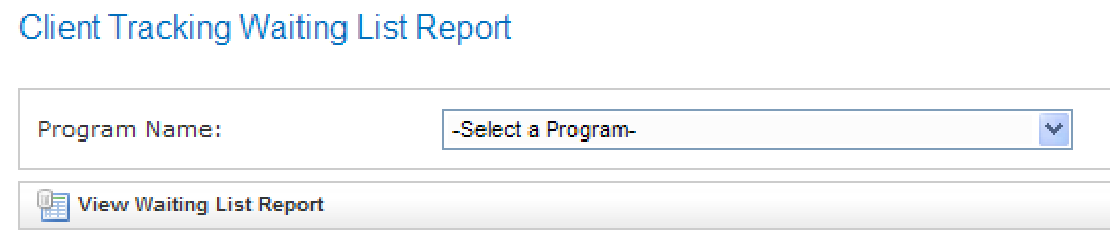
All Client Tracking Reports are accessible through the Reports link in the menu bar. Click the word Reports, scroll down and click the desired report. Choose the criteria or program name and then click the View____ Report button.
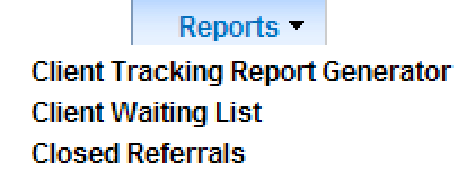
Client Tracking Report Generator
Client Waiting List
Closed Referrals